


Getting dirty: the worm edition

Aren’t they adorable? Red worms for worm composting. (photo: Lucy Martin)
This follows an earlier post by Ellen Rocco on NCPR-types getting down and dirty. (Yeah, we like to mix things up and dig deep!)
Worm composting is nothing new. I was sort of slow to try it out, but about two years ago a friend shared some extra worms and I’ve been keeping a bin ever since.
The good news is keeping a worm bin isn’t much trouble at all. Surprisingly, there’s no smell to speak of and the care required is minimal. Mind you, if worms, or mounds of muck, creep you out, don’t try this at home!
The bad news: I’m just not sure the end result justifies the endeavor.
While the red worms recommended for this job are said to eat about half their own weight every day, they don’t weigh that much, folks. It’s a slow process with a fairly low output. Contrast that to my July project of establishing a sourdough starter. It’s already a good culture and gives me great bread several times a week. A better return on effort.
Our household of just two generates kitchen trimmings at a far great rate than one modest worm box can handle. So we still have and use a back yard compost unit and send less readily composted material (like oily stuff) out by way of Ottawa’s Green waste collection system.
But, seriously, if you want to close the loop of converting waste to more food, consider raising chickens, rabbits or pigs. In our case, we travel too often to meet the daily care required by livestock, which is a plus for worms, I guess. They can run their own lives pretty well without constant care.
Anyway, this week it was essential that I clean out and totally renew my bin, because it had become far too wet. (Amazingly, the worms seem to chomp along just fine even in less-than-ideal conditions.) That job consisted of dumping it all out, scrubbing the main bin, separating the desired casing/humus from the worms (humus = the shredded newspapers and kitchen scraps that had been digested) ripping up new bedding and putting the worms back in with more food.
All shown here in stages:

Clean bin filled with more ripped newspaper beside mix of worms and old muck – which should not be this wet. (photo: Lucy Martin)
Note: the ripped newspaper is supposed to be moistened until damp, but not sopping. I skipped that because the muck going back in was already plenty wet enough to do the job.
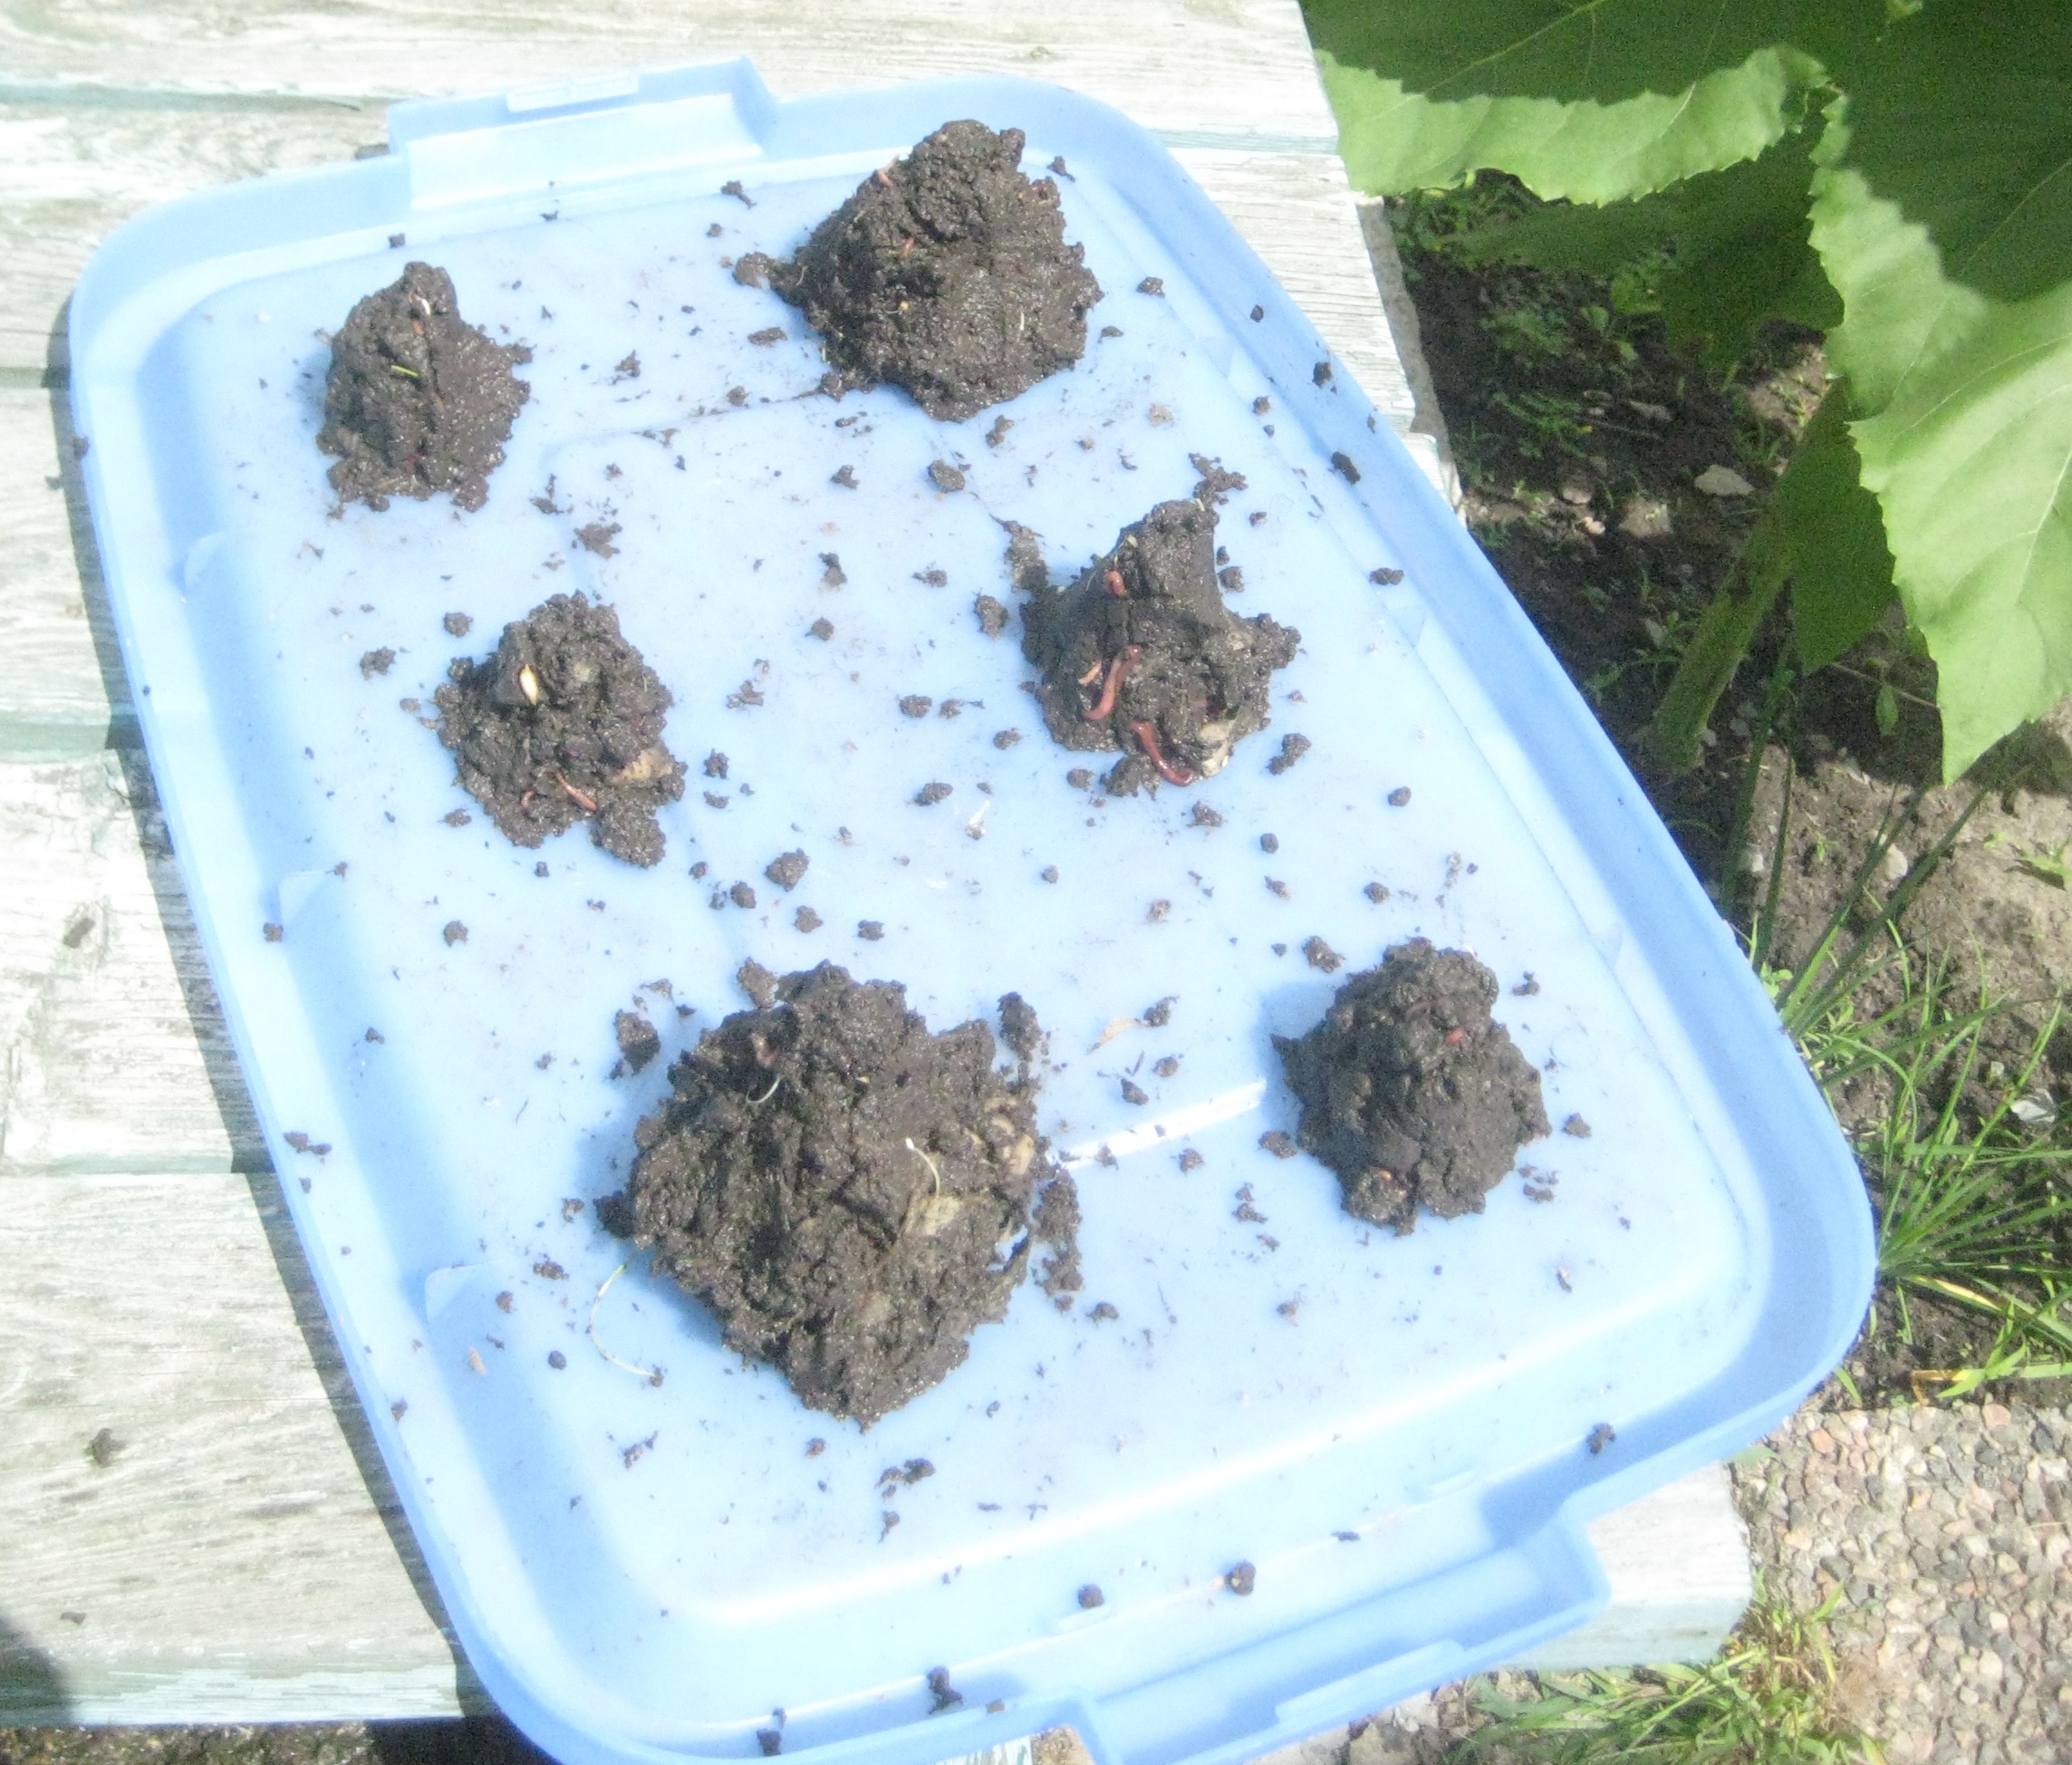
And how, pray tell, does one salvage the live worms? Well, there are different methods. I went with making cones. The worms prefer to avoid light and air, so they burrow down.

Stage one: build some cones. (photo: Lucy Martin)
You can guess the rest.
Remove outer layers of each cone, and the few worms that come off too. (photo: Lucy Martin)
By the end of this process, the worms are doing a group hug that practically pushes any humus out from the compact mass. It’s kinda cool.
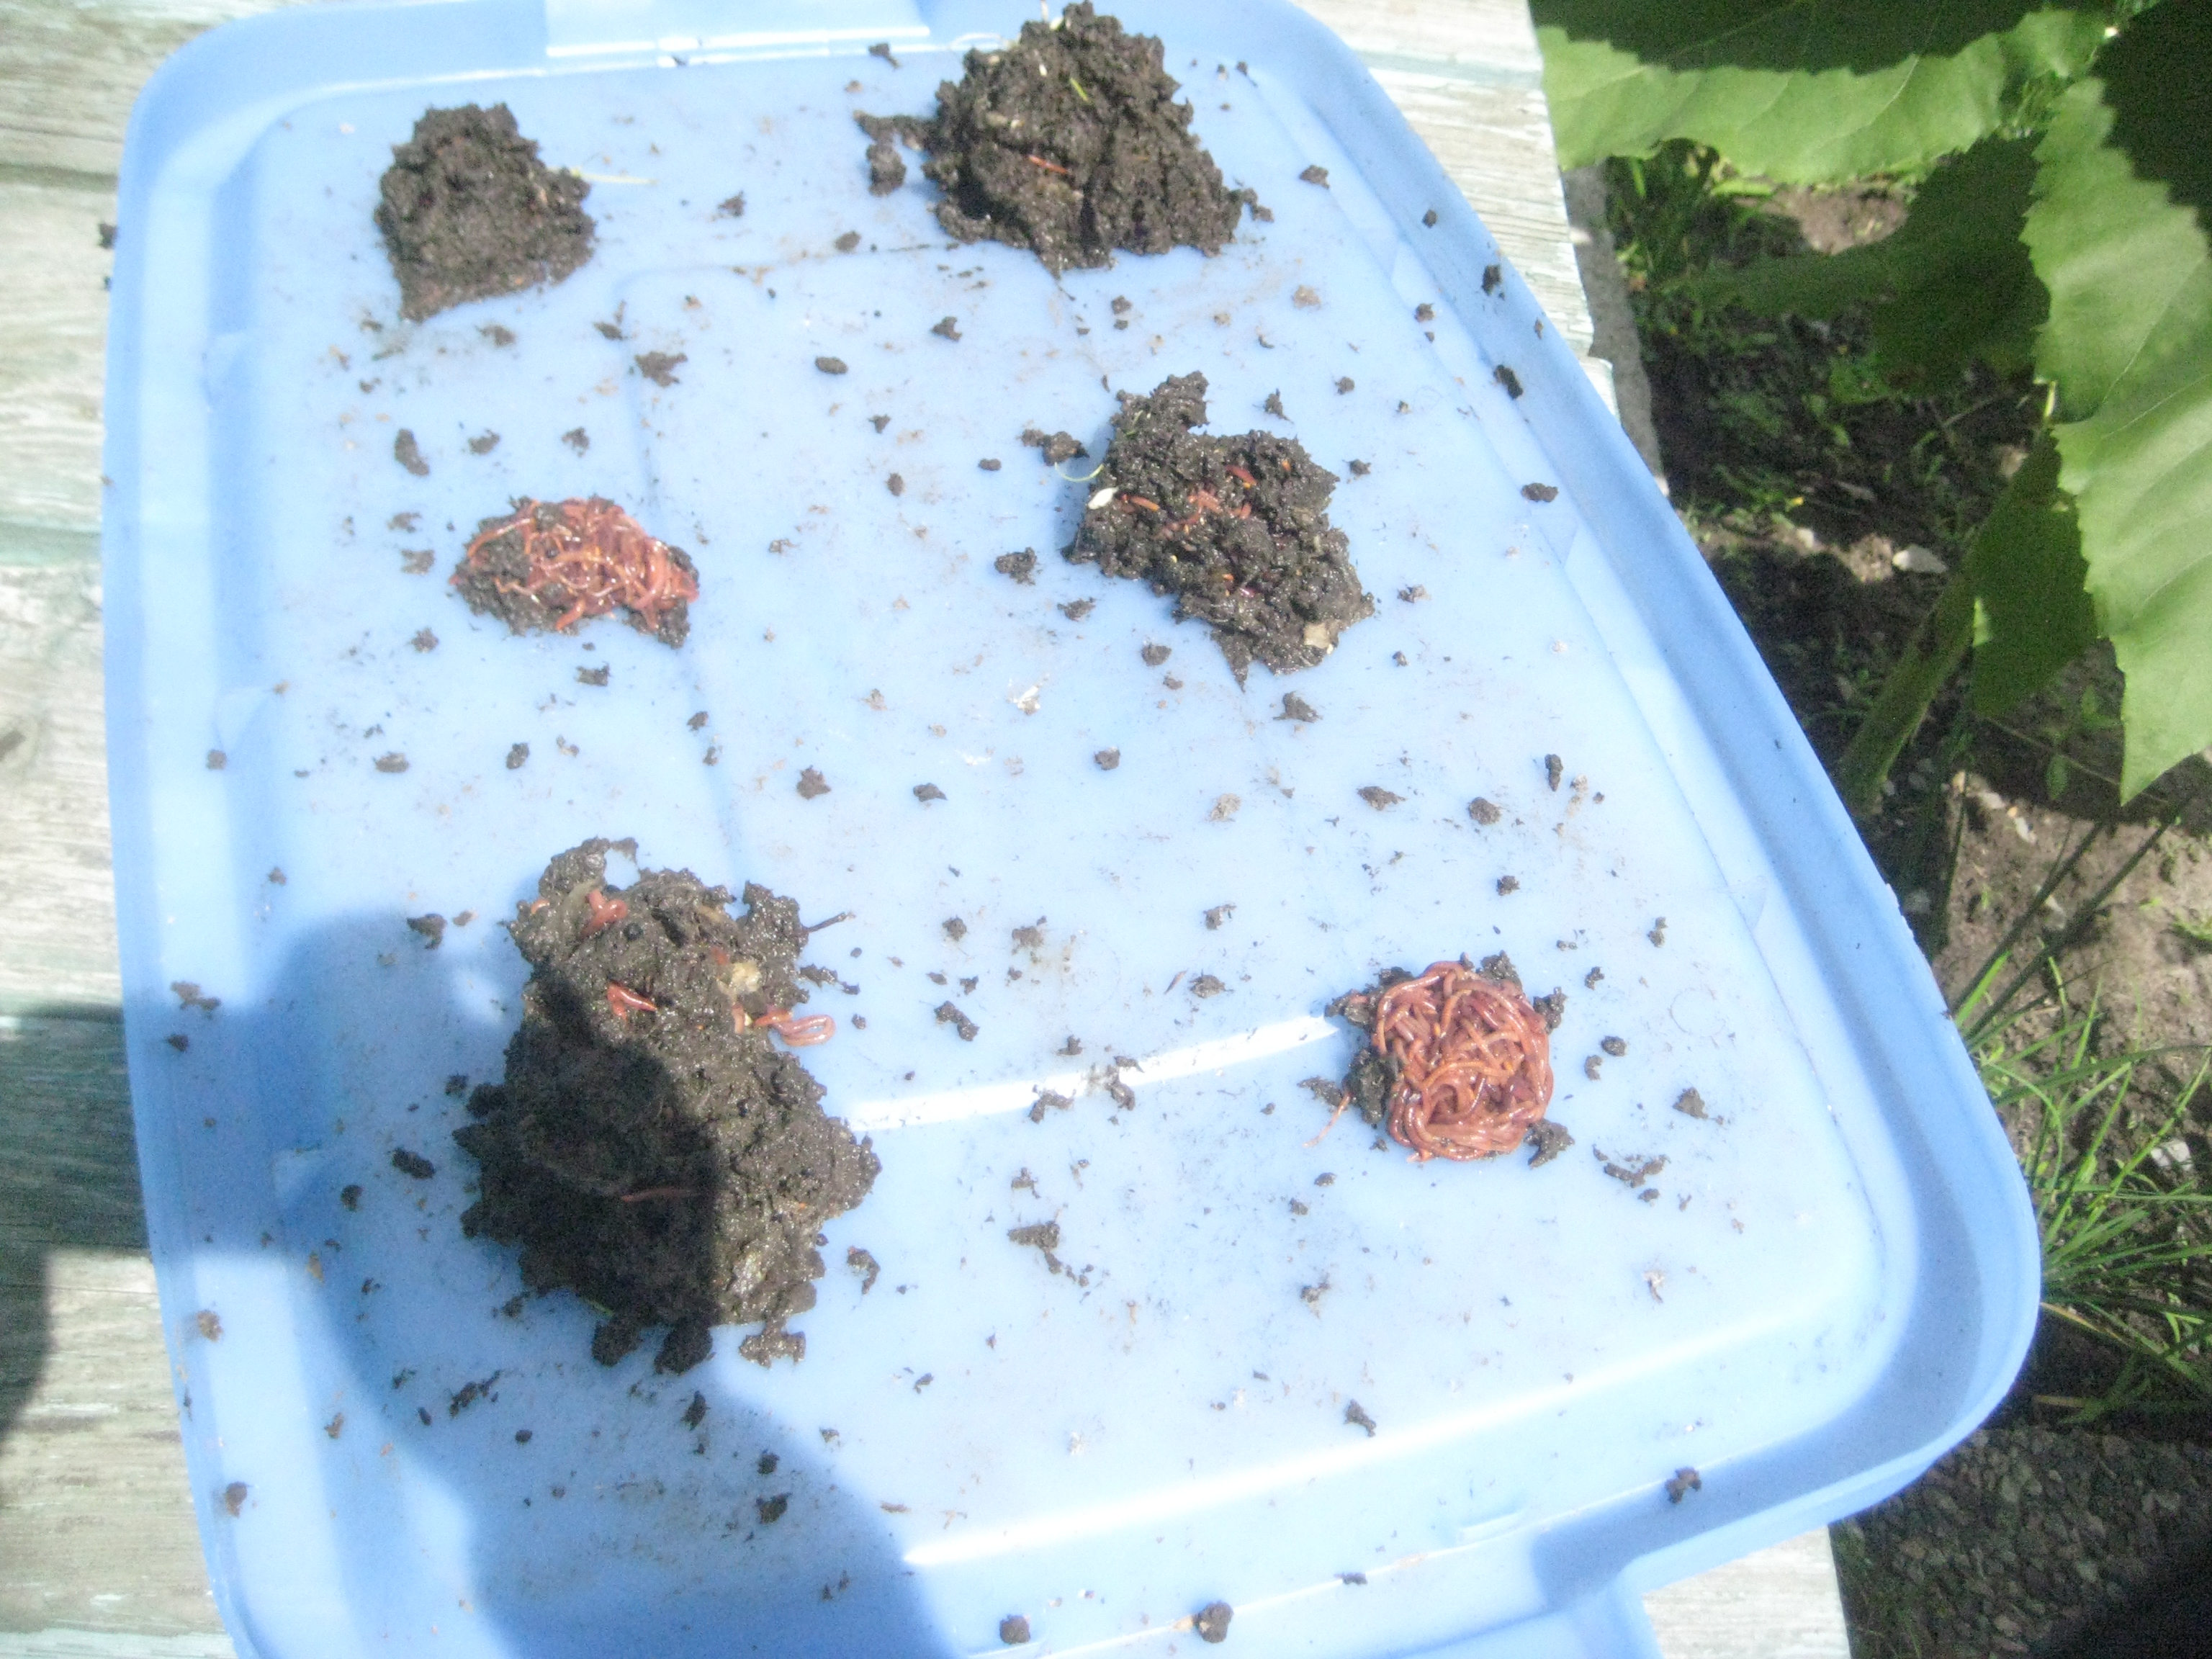
The poor worms are probably freaking out, but by the end of this process they are easily gathered and moved. (photo: Lucy Martin)
This gave me half a three-gallon bucket of worm casing fertilizer. The worms went back into the fresh/clean bin.
Yes, eggs and the smallest worms are lost this way. But so it goes, they can’t all be sifted out.
I wanted to share a webpage on making a worm farm from the Louisiana Department of Environmental Quality. Maybe it’s just because humor on a government page was unexpected, but I found it laugh-out-loud funny. This excerpt also suggests easier ways to sort worms from muck:
Some folks sort the worms out of the castings and put the worms in fresh bedding. We have other things to do with our time and prefer a split harvest method. It helps if you have trained your worms ahead of time for this harvest method. To train your worms, you start feeding them at only one end of the bin. Do this for about a week. (Worms learn pretty fast.) Now take the bedding/castings out of the end of the farm where you were not feeding them and add it to your plants or garden. You will be removing about half to two thirds of the bedding/castings in this step. You will lose some worms, but those were the ones that were not very smart. Remember you trained the others. Place the remaining bedding/castings in a container while you scrub the bin and fix new bedding. Prepare this bedding the same way you did the first time, damp newspaper, crushed egg shells, and a handful of dirt. Now add the worms you trained, castings and all onto the fresh bedding. Feed and you are back in business. I have found that the worms will move out of the old bedding in a couple of days. If you want a cleaner farm, you can remove the old bedding in a few days.
So, that’s the scoop on the dirtiest chore I did this week. (Besides the cat’s litter box.)
Do you keep worms and have tips to share?
Again, I remain skeptical this is all that useful. But it’s sort of fun and makes me feel, I don’t know, semi-virtuous!


